
Fast & Easy Quote Request For CopperMoon Lighting
Description
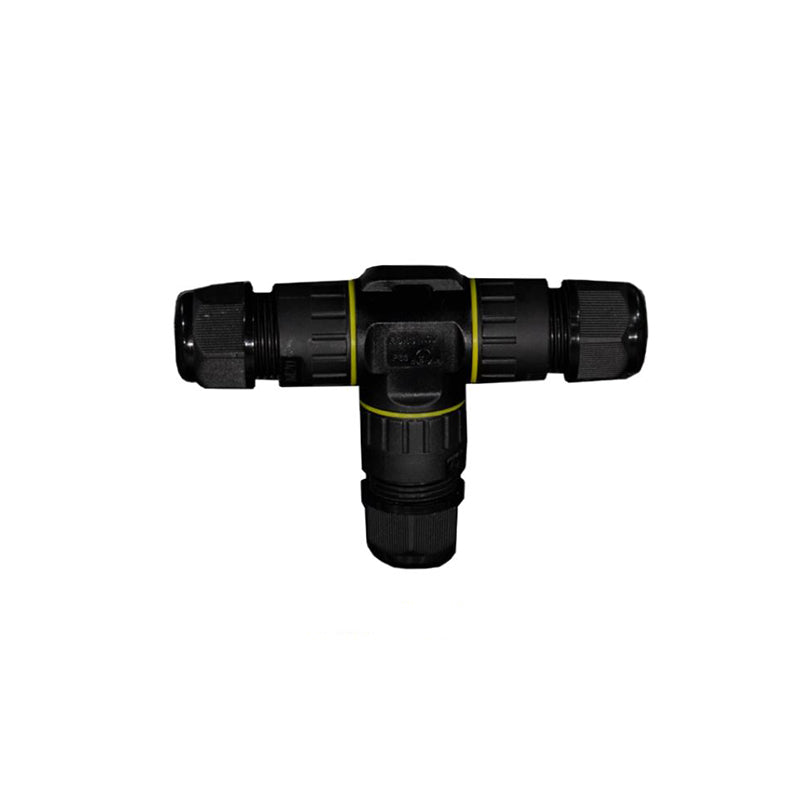
CopperMoon Brilliance LED Bistro String Reel T-Connector One (1) per Center Feed
The Low Voltage Bistro String T Connector is an accessory to customize the length of the Low Voltage Bistro String Reel only. Use with Brilliance Low Voltage Bistro String for wherever you want to change directions, or when you need o combine two sections of SO (stranded oil resistant) cable. Order one Low Voltage Bistro String T Connector for each center feed used.
INSTALLING THE BISTRO STRING T CONNECTOR
- Unscrew the plastic nut from the SO Cable side of the connection.
- Use needle nose pliers to gently remove the one-hole rubber grommet from the throat coupler.
- Unscrew the throat coupler from the center coupler.
- Using a Philips screwdriver, unscrew the two cable terminals on either side from each other. The middle
terminal is not used for two conductor SO cable. - Strip the SO cable to reveal the black and white conductors, approximately 1-1/2 inches.
- Pass the plastic compression nut over the SO cable with the rounded side first.
- Insert the SO cable through the hole of the rubber grommet.
- Pass the SO cable through the large side of the throat coupler with the fin side first.
- Insert the black and white conductors into the opened terminals. Tighten both terminal screws.
- Once both conductors are attached, thread the throat coupler to the center on the terminal side and screw them together to tighten.
- Position the one-hole rubber grommet into the fin side of the throat coupler.
- Thread the compression nut back on to the fin side of the throat coupler. Hand tighten until the SO cable has been compressed. Do not overtighten.
- Repeat these instructions for each side of the T connection.
Product Files

